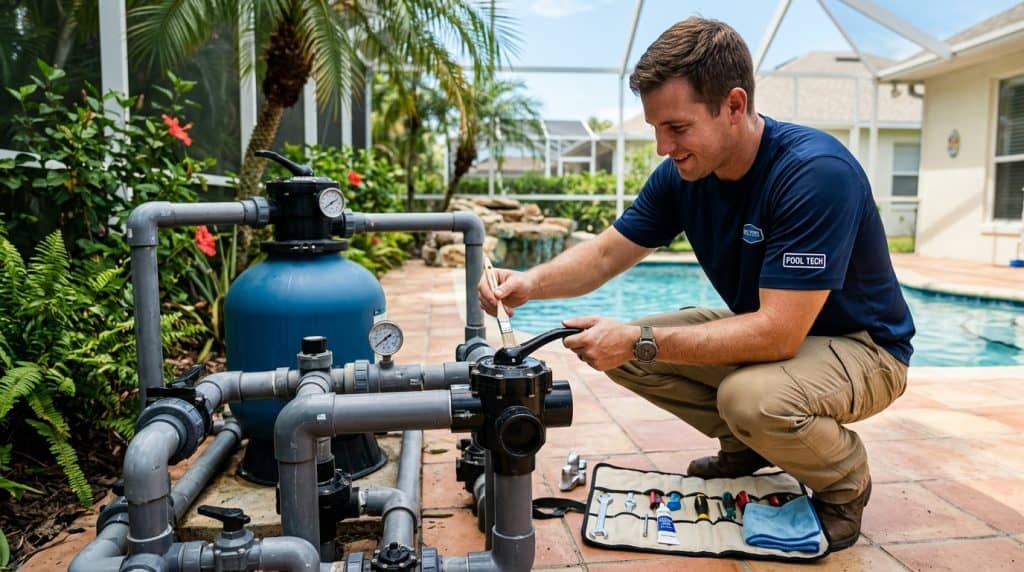
If you have spent more than five minutes on a residential equipment pad anywhere in Hillsborough, Pinellas, or Pasco County, you have undoubtedly encountered the workhorse of modern pool plumbing: the Jandy NeverLube diverter valve. Recognizable by its stout CPVC body, red or grey lock knob, and indexed handle, this valve has been the industry benchmark for decades. Pool builders love them because they are durable, easily automated with actuators, and theoretically maintenance-free.
Notice the word theoretically. The marketing moniker “NeverLube” leads many Florida pool owners to believe these components will operate indefinitely without a drop of attention. Unfortunately, between the brutal subtropical UV radiation, year-round pump run times, calcifying hard water, and windblown coastal sand, even the toughest valves eventually break down. Suddenly, you find your pool diverter valve hard to turn, or you walk out to the equipment pad to find water pooling around the plumbing because your jandy diverter valve leaking from top is spraying a fine mist across your motor.
As a CPO (Certified Pool Operator) working daily under the blistering Florida sun, I have disassembled, rebuilt, and plumbed hundreds of these valves. In this master guide, we will break down exactly how to diagnose failures, select the proper rebuild kit for jandy neverlube valve assemblies, and step-by-step repair leaking jandy 3 way valve installations before a minor drip turns into an air-entrained hydraulic nightmare.
The “NeverLube” Myth vs. Tampa Bay Reality
To fix the issue, you must understand why it happens. Traditional brass and PVC pool valves from the 1970s and 1980s required periodic disassembly and packing with messy, thick silicone or fluorosilicone grease to maintain a seal and allow the diverter to pivot. Jandy changed the industry by manufacturing their NeverLube internal diverter gate out of a specialized, low-friction composite plastic (specifically engineered with self-lubricating fluoropolymer compounds). In standard conditions, the diverter face seals tightly against the inner cylinder wall of the valve body without needing grease.
However, the valve still relies on mechanical elastomeric seals to keep water inside the plumbing and air out:
- Two small stem O-rings positioned along the diverter shaft.
- One large cover O-ring seated in a perimeter groove underneath the clear lid.
- A low-friction Teflon or composite washer sitting directly under the handle assembly.
In our Tampa Bay climate, surface temperatures on a slab-mounted equipment pad routinely climb above 120°F during July and August. Combine that radiant heat with relentless UV degradation, chlorine exposure, and high calcium levels (especially in local plaster and pebble pools), and those rubber seals become flattened, brittle, and coated in scale. When the seals dry out or become compromised by calcification, friction spikes dramatically. That is when you end up with a stiff handle, or worse, water escaping from the stem.
Anatomy of a Failure: Diagnosis & Symptoms
Before ordering replacement parts or reaching for your tools, take three minutes to inspect the valve while the pump is running and while it is shut down. A failing Jandy 3-way or 2-way valve presents symptoms differently depending on whether it sits on the suction side or the pressure side of your system.
1. Jandy Diverter Valve Leaking From Top (Stem Leak)
If you see water weeping out from directly beneath the locking knob or pooling in the circular recess of the handle, the dual stem O-rings have degraded. When the pump is under pressure (such as a return valve directing water between pool returns, deck jets, or a spa spillway), water is forced up along the metal or composite shaft. When the pump turns off, gravity often pulls that standing puddle down into the valve, introducing dirt into the shaft bore.
2. Air Bubbles in the Pump Basket (Suction Leak)
If the valve sits before the pump—controlling flow from your skimmers, main drains, or dedicated vacuum line—a failed stem O-ring will rarely leak water outward. Instead, the powerful negative pressure generated by the pump draws atmospheric air inward. You will notice a churning mass of bubbles inside the clear pump strainer lid, sputtering return jets, and potentially a pump that loses prime every time it shuts down.
3. Pool Diverter Valve Hard to Turn (Internal Binding)
If you feel like you are about to snap the handle off just trying to switch from pool mode to spa mode, do not force it. The composite handle can sheer off its splines, or you could snap the internal stop pins built into the lid. This stiffness is typically caused by one of three things:
- Accumulated calcium carbonate scaling along the internal sealing barrel.
- Fine sand or crushed shell particles lodged between the diverter blade and the valve floor.
- Swollen, dried, or pinched stem O-rings that have lost their operational elasticity.
4. Water Bypassing the Closed Port
If you set your valve to isolate the spa, but your spa continues to drain down or overflow, the diverter gate’s rubberized sealing face has either warped, torn, or been chewed up by debris pulled through the line. In this scenario, replacing the O-rings alone will not solve your issue; you will need the full internal diverter assembly.
Choosing the Right Rebuild Kit for Jandy NeverLube Valve
When shopping for replacement parts, do not buy generic, non-pool-rated rubber O-rings from a big-box hardware store. Pool plumbing demands specialized Buna-N (Nitrile) or Viton elastomers that can withstand chlorinated water, UV radiation, and high operating pressures.
You have two primary routes when sourcing a rebuild kit:
- The O-Ring Only Kit: Contains two stem O-rings, one lid cover O-ring, and the stem washer. Choose this if your diverter gate is unscratched, your lid is uncracked, and your only issue is an external water leak or tight stem.
- The Complete Diverter Rebuild Kit (Jandy Part # 4720): Includes the entire internal diverter assembly with pre-installed rubber sealing edges, new stem O-rings, the cover O-ring, stop pins, and a new lid washer. This is the gold standard for restoring a stiff or internally bypassing valve back to factory spec.
Pro Tip: Check your valve body size. While Jandy NeverLube valves generally share common internals across their 1.5-inch to 2-inch and 2-inch to 2.5-inch platforms, make sure you do not have an ancient Jandy Gray valve (pre-NeverLube era), which uses a completely different, permanently lubricated grease-cap diverter.
Essential Tools & Supplies Checklist
Prepare your tools ahead of time so your pool system is not down for hours under the Florida heat:
- #2 or #3 Phillips screwdriver (a hand screwdriver is preferred over a drill to prevent stripping the CPVC housing).
- Small brass O-ring pick or plastic pry tool (never use a sharp steel pick that can score the plastic stem groove).
- A bucket with clean water and a clean microfiber rag.
- 100% silicone-based pool lubricant (e.g., Magic Lube II, Boss 820, or Lube-Tube). Never use petroleum-based lubricants like Vaseline, WD-40, or automotive grease; petroleum permanently softens, swells, and destroys Buna-N O-rings.
- Diluted muriatic acid solution (10:1 water to acid) or white vinegar in a spray bottle if severe calcium scaling is present.
- Your replacement rebuild kit for jandy neverlube valve.
Step-by-Step: How to Repair Leaking Jandy 3 Way Valve
Step 1: Power Down and Depressurize the System
Safety starts at the breaker panel. Cut power to your pool pump, automation panel, and chlorinator. If you have automated valve actuators (Jandy Valve Actuators or JVAs) mounted on top of the valve, turn off their dedicated breakers. Next, walk over to your pool filter and slowly turn the manual air relief valve counterclockwise until the pressure gauge drops to 0 PSI. If your equipment pad sits below the water level of the pool, ensure you close your isolation valves or plug your pool wall fittings to avoid siphoning hundreds of gallons of water onto your pad.
Step 2: Remove the Actuator or Handle Assembly
If your valve is automated, back out the four long corner screws securing the electric actuator to the valve body and lift the actuator straight up. If it is a manual valve, unscrew the central lock knob (the knob on top of the handle) counterclockwise until it comes off. Lift the handle off the splined shaft. Keep track of the small Teflon/composite washer sitting under the handle; set it safely aside.
Step 3: Disassemble the Lid Screws
You will see eight Phillips head screws holding the clear/translucent lid to the black CPVC valve body. Remove these screws carefully. Keep constant downward pressure on your screwdriver so you do not strip the heads. If you encounter a screw seized by rust or salt corrosion, tap the back of your screwdriver gently with a rubber mallet to shock the threads loose before turning.
Step 4: Extract the Diverter and Inspect the Interior
Grasp the stem and pull upward with a slight twisting motion. The entire lid and internal diverter assembly should pull free from the valve body. Slide the clear lid up and off the diverter stem. Now, conduct your forensic inspection:
- Run your thumb along the inside cylindrical wall of the CPVC valve housing. It should feel glass-smooth. If you feel severe vertical gouges caused by rocks or debris, a simple rebuild may not create a watertight seal.
- Inspect the rubberized face of the diverter. Look for chunks missing, peeling edges, or deep pitting.
- Examine the clear lid around the screw holes. Look for stress fractures or spiderweb cracks, which are common when screws have been overtorqued during previous services.
Step 5: Clean and Descale
Wipe out the interior of the valve chamber with your microfiber towel. If your pad has calcium buildup—common in our Tampa Bay limestone-rich water supply—spray the internal surfaces and the diverter with your diluted acid or vinegar solution. Let it fizz for two minutes, scrub it clean with a soft nylon brush, and flush thoroughly with fresh water. Never use coarse steel wool or abrasive sandpaper on the internal sealing barrel.
Step 6: Strip and Replace the O-Rings
Using your brass pick or plastic tool, remove the two small O-rings from the grooves on the diverter stem. Carefully remove the large perimeter O-ring from the underside of the lid. Wipe down the empty O-ring channels to ensure no grit remains trapped beneath the new rubber.
Take your new stem O-rings from your rebuild kit, apply a light, slick coating of 100% silicone lubricant between your fingertips, and slide them into their respective grooves on the shaft. Apply silicone lubricant to the large lid O-ring and seat it firmly into the channel on the underside of the clear lid. The silicone does not degrade the NeverLube material; instead, it prevents the rubber from chafing, binds out micro-grit, and ensures effortless rotation.
Step 7: Realign and Reassemble
Pay close attention during reassembly—misaligning a 3-way valve can accidentally dead-head your pump, which will explode plumbing lines or blow out your filter tank within seconds of startup:
- Slide the clear lid back down over the lubricated diverter stem.
- Orient the diverter blade according to your hydraulic needs. Note that the diverter paddle blocks off the port you do not want flow entering or exiting.
- Lower the diverter and lid back down into the valve body. Align the screw holes.
- Hand-thread all eight lid screws. Once they are seated, use your screwdriver to tighten them in a crisscross, star-shaped pattern (just like tightening lug nuts on a car tire). This distributes downward pressure evenly across the lid O-ring, preventing warping and pinching. Tighten until snug; do not use brute force or power tools to torque them down.
- Slide the stem washer back over the shaft, place your handle back onto the splines, and screw the lock knob down hand-tight.
Step 8: System Pressure Test
Open all necessary valves, ensure the pump pot is filled with water, and fire up your pump system while keeping the manual air relief valve open on your filter. Once a steady stream of water shoots out of the air relief, close it. Inspect the top of your newly rebuilt valve with a flashlight. Is there any moisture escaping around the stem? Is the pool diverter valve hard to turn, or does it glide smoothly across its stops? If your handle turns effortlessly with one hand and remains bone-dry under full system pressure, your rebuild is complete.
Diagnostic Checklist for Jandy Valve Health
Use this quick-reference checklist whenever you perform routine seasonal pad checks:
- Visual Check: Are salt crystals or white calcium tracks visible running down the valve body? (Indicates an active or intermittent stem leak).
- Tactile Check: Can you rotate the handle smoothly through its sweep with mild hand pressure? (If it binds, lubricate and descale immediately).
- Structural Check: Are any of the 8 perimeter screws loose or missing? (Vibration can back out screws on variable-speed pumps running high RPMs).
- Auditory Check: Do you hear a high-pitched whistling or sucking sound near the valve on the suction line? (Indicates stem air intrusion).
Preventive Maintenance Tips for Tampa Bay Pool Owners
Plumbing hardware in Central Florida takes twice the beating of systems up north. To get an extra five to ten years out of your valve rebuild, implement these field-proven practices:
- Shade Your Equipment Pad: Intense afternoon sun breaks down the plasticizers in CPVC and turns clear acrylic lids cloudy and brittle. If your equipment sits on the south or west side of your home, install an equipment cover or shade screen.
- Keep Chemistry in Balance: Chronically high LSI (Langelier Saturation Index) precipitates calcium directly onto equipment surfaces. Keeping your pH between 7.4 and 7.6 and your saturation index balanced prevents scaling inside your valves.
- Exercise Your Valves: If your valves sit in one static position for months (for example, standard filtration mode), calcium scale forms an anchor over the sealing edges. Turn your manual valves through their full range of motion once a month to break free micro-deposits before they bond.
When Rebuilding Isn’t Enough: Knowing When to Replace
While a repair leaking jandy 3 way valve procedure saves money 90% of the time, there are moments when a rebuild is a waste of effort. You must cut out and replace the entire valve body if:
- The main CPVC body has hairline freeze cracks or stress fractures radiating out from the inlet/outlet slip ports.
- The internal female screw threads in the CPVC body are stripped out, preventing the lid from cinching down.
- The valve was subjected to high heat from a run-dry pump failure, which causes the inner barrel to warp out of round. No new diverter will ever seal an egg-shaped valve chamber.
If you find yourself dealing with cracked manifolds, plumbing conversions, or automated actuators that refuse to coordinate, do not hesitate to contact professional help. The licensed technicians at Tampa Bay Pool Care provide expert diagnostics, equipment pad re-plumbing, and full automation repairs across the greater Tampa Bay region to keep your pool running smoothly and efficiently year-round.