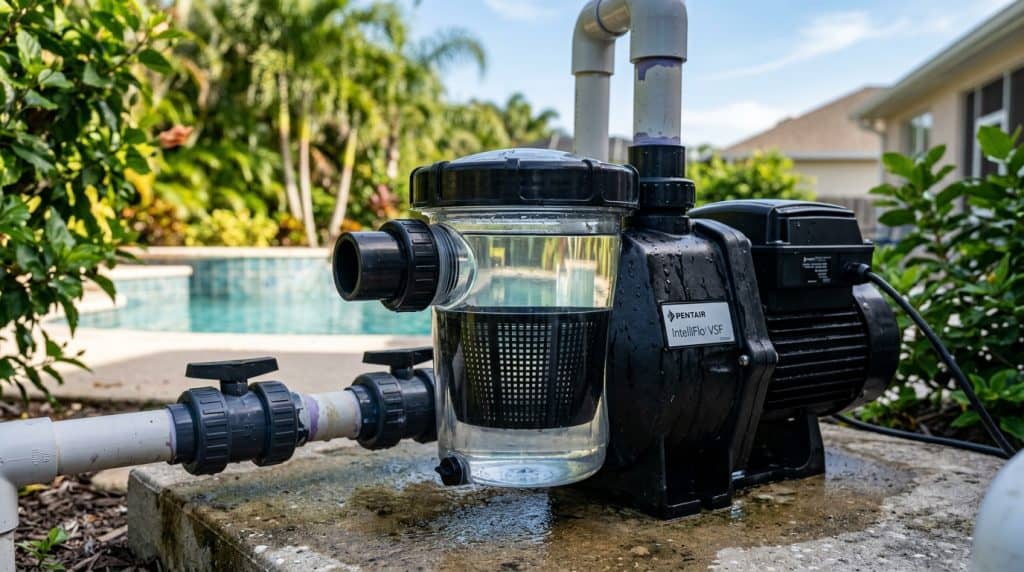
There’s nothing quite like the sound of silence in a Tampa Bay backyard, unless that silence is supposed to be the comforting hum of your pool pump doing its job. Instead, you might wake up to a sputtering, air-filled pump basket, or worse, a completely silent system, indicating that your pool pump loses prime overnight. For us here on the Gulf Coast – from the sun-drenched shores of Clearwater to the bustling neighborhoods of Brandon – this isn’t just an inconvenience; it’s a common, frustrating, and potentially damaging problem.
As a CPO-certified pool service technician with over two decades of experience navigating Tampa Bay’s unique subtropical challenges – the relentless UV rays, the occasional hurricane’s aftermath, even the ever-present live oak pollen – I’ve seen every variation of this issue. A pool pump losing its prime is almost always a tell-tale sign of a suction-side air leak. And in our humid, high-demand environment, ignoring it can lead to bigger headaches, higher energy bills, and even premature pump failure.
This comprehensive guide is designed to empower you, the Tampa Bay homeowner, with the knowledge and practical steps to diagnose these sneaky air leaks. We’ll delve deep into the common culprits, equip you with a DIY toolkit, and walk you through step-by-step diagnostic procedures, all while keeping our local conditions in mind. So, let’s roll up our sleeves and get that prime back!
The Lifeline of Your Pool: Understanding Prime and Why It’s Lost
First things first, what exactly is “prime”? In simple terms, a pool pump is primed when it’s completely full of water. This creates a vacuum effect, allowing the pump to pull water from your pool through the skimmers and main drain, push it through the filter, heater (if you have one), and sanitation equipment, and then return it clean and clear to your pool. It’s the engine of your entire circulation system.
When your pool pump loses prime overnight, it means that somewhere along the suction side of the system (the part of the plumbing leading from the pool to the pump), air is sneaking in. While the pump is running, it might still manage to pull water, but the air entry causes inefficiency, cavitation (that tell-tale sputtering sound), and puts stress on the pump. When the pump shuts off, gravity and water pressure try to equalize, and if there’s a leak, air enters and replaces the water in the pump. By morning, you’re left with a pump full of air, unable to restart its flow.
A key indicator of this problem is finding air in pool pump basket when shut off, even if the water level was perfectly fine the day before. This isn’t just cosmetic; a constant struggle to maintain prime can overheat your pump motor, wear out seals prematurely, and dramatically reduce the effectiveness of your filtration system. In Tampa’s scorching summers, proper circulation is non-negotiable for preventing algae blooms and maintaining water chemistry.
Identifying the Sneaky Culprits: Common Suction-Side Air Leak Locations
Suction-side air leaks can hide in many places. Think of the plumbing from your skimmers and main drain, all the way to the front of your pump basket. Here are the most common spots where we find air sneaking in:
The Pump Basket Lid & O-Ring: Often Overlooked, Easily Fixed
This is by far the most frequent offender. The clear lid on your pump basket allows you to see inside, but it relies on a perfect seal to prevent air entry. Over time, especially under Tampa Bay’s intense UV radiation, the lid itself can develop hairline cracks, or the large rubber O-ring underneath can become dry, cracked, flattened, or simply displaced. If the pool pump lid o-ring grease isn’t regularly applied, or if the lid isn’t tightened correctly, it’s an open invitation for air.
- Lid Cracks: Inspect the clear lid for any hairline fractures, especially around the edges where it seats.
- O-Ring Condition: Remove the O-ring and check it for dryness, tears, flattening, or stretching. It should feel pliable and soft.
- Debris: A tiny twig, a piece of pollen, or even sand can get caught under the O-ring, breaking the seal.
Plumbing Connections & Valves: Where PVC Meets Wear and Tear
Every joint, union, and valve on the suction side is a potential entry point for air. Our Florida sun bakes PVC, making it brittle over time. Ground movement (hello, limestone soil!) can also stress connections. Look for:
- Unions: These threaded connections (often at the front of the pump and filter) have O-rings inside that can fail.
- PVC Pipe Connections: Glued joints can sometimes fail, especially in older systems or if not properly primed and glued during installation.
- Skimmer and Main Drain Valves: Jandy valves, diverter valves, or gate valves can leak around their shafts or internal seals. These are critical suspects if you have a lanai enclosure, as repairs might require some careful maneuvering.
- Threaded Plugs: Any threaded plugs on the pump (e.g., drain plugs, priming plugs) must be tightly sealed with Teflon tape or sealant.
Other common spots include:
- Skimmer Weirs & Baskets: A crack in the skimmer body itself, or a basket that’s not seating correctly, can lead to air ingress if the water level drops too low.
- Underground Lines: Less common for a slow overnight prime loss, but a significant crack in a buried skimmer or main drain line can definitely cause issues. This is often more noticeable with a rapid, continuous loss of prime when the pump is running.
- Heater Bypass Lines: If you have a heater, ensure its bypass valves are properly sealed.
Your DIY Leak Detective Kit & Initial Checks
Before you start tearing things apart, gather a few essential items. A little preparation goes a long way when you’re trying to figure out how to find suction air leak pool plumbing.
- Silicone-based Pool Lube: Essential for O-rings. Never use petroleum jelly!
- Screwdrivers/Wrenches: To tighten clamps or open pump lids.
- Bucket: For cleaning debris.
- Shop Vac (optional but helpful): For creating localized suction or blowing air.
- Food Coloring or Pool Dye: For visual confirmation of leaks, especially in skimmers.
- Small Spray Bottle with Water and Dish Soap: For creating bubbles.
- Good Flashlight: For inspecting dark corners.
- Rubber Gloves: To keep your hands clean.
Initial Checks (Before You Start Testing):
- Check Water Level: Ensure your pool’s water level is at least halfway up the skimmer opening. If it’s too low, the skimmer will naturally suck air.
- Inspect Pump Basket: When the pump is off, is the basket full of water, or is there a noticeable air gap? This confirms the overnight prime loss.
- Clear Debris: Make sure skimmer and pump baskets are clean and free of excessive debris.
- Valve Positions: Confirm all suction-side valves (skimmer, main drain, vacuum lines) are fully open or closed as they should be. Sometimes a partially closed valve can create turbulence that looks like an air leak.
- Look for Obvious Damage: Do a quick visual scan for any visible cracks on the pump lid, manifold, or exposed PVC pipes, particularly areas that get a lot of sun exposure.
Step-by-Step Diagnostic Procedures for Suction Leaks
Now, let’s get into the systematic troubleshooting. The goal is to isolate the problem area.
Procedure 1: The Pump Basket Lid & O-Ring Test (First and Easiest)
This is where you should always start. It’s the most common culprit and the easiest to fix.
- Turn Off Pump: Always shut off power at the breaker before working on your pump.
- Remove Lid and O-Ring: Carefully twist off the pump basket lid and remove the large O-ring.
- Clean and Inspect:
- Clean any debris from the O-ring and the groove it sits in.
- Inspect the O-ring for any flat spots, nicks, cracks, or signs of drying. If it looks compromised, replace it.
- Inspect the clear pump lid for hairline cracks, especially if it’s an older model exposed to years of Tampa sun.
- Lubricate: Apply a generous amount of silicone-based pool lube (like Magic Lube) to the O-ring. This keeps it pliable and helps create a perfect seal. Don’t skimp on the pool pump lid o-ring grease!
- Re-seat and Tighten: Carefully re-seat the O-ring, ensuring it’s not twisted. Place the lid back on and tighten it firmly by hand. Do NOT overtighten with tools, as this can crack the lid or stretch the O-ring.
- Restart Pump: Turn the pump back on. It may take a minute or two to prime. Watch for continuous small bubbles returning to the pool, which might indicate lingering air in the system, but the pump basket should remain full. Check again in the morning to see if the pool pump loses prime overnight.
Procedure 2: The Shaving Cream / Soapy Water Test (for Above-Ground Leaks)
This method is excellent for pinpointing leaks on exposed plumbing from the skimmer to the pump.
- Fill Spray Bottle: Mix dish soap and water in a spray bottle, or grab a can of shaving cream.
- Inspect Under Pressure: Turn your pool pump on and ensure it’s fully primed. You want the system under suction.
- Spray Suspect Areas: Starting from the skimmer side and working your way to the pump, liberally spray or apply shaving cream to every union, valve, threaded fitting, and visible glued joint on the suction side. Pay close attention to connections near the pump, particularly those exposed to direct sunlight on your lanai.
- Watch for Suction: If there’s an air leak, the soap bubbles or shaving cream will be visibly sucked into the leak point. This is a very clear indicator.
- Mark and Repair: Once a leak is identified, mark it and plan your repair (e.g., tightening a union, replacing an O-ring, re-taping a threaded plug, or calling a professional for a PVC patch).
Procedure 3: The Skimmer & Main Drain Isolation Test
This helps you determine if the leak is in your skimmer line, main drain line, or a shared component.
- Isolate Skimmer:
- Ensure the pump is running and primed.
- Fully close the main drain valve (if you have one) so the pump is only drawing water from the skimmer.
- Place a pool dye (or a few drops of dark food coloring) near the skimmer opening underwater, especially if you suspect a crack in the skimmer body or near the weir. If there’s a leak, the dye will be sucked into the crack.
- Observe the pump basket for continuous air bubbles.
- Let the pump run on only the skimmer for several hours, then check again in the morning for prime loss.
- Isolate Main Drain:
- Reverse the process: fully close the skimmer valve and open the main drain valve.
- Observe the pump basket for air bubbles.
- Run for several hours and check for prime loss.
- Identify the Culprit: If the pump loses prime only when drawing from one source, you’ve narrowed down the leak to that specific line or its associated components. If it loses prime with both, the leak is likely shared (e.g., pump lid, unions at the pump, or main suction manifold).
When you’re dealing with air in pool pump basket when shut off, these isolation tests are crucial for homing in on the problem area.
When to Call the Pros: Protecting Your Investment and Peace of Mind
Sometimes, despite your best efforts, that pesky air leak remains elusive. Or perhaps you’ve identified the leak, but it requires specialized tools or expertise, such as:
- Underground Leaks: If you suspect a leak in a buried pipe (often indicated by a wet spot in your yard, or if all above-ground checks yield nothing), specialized leak detection equipment is needed.
- Cracked Skimmer Body: Repairing a crack in the skimmer body can be complex, especially if it’s old PVC or concrete, and might require draining a portion of the pool.
- Persistent Valve Leaks: Some valve repairs require disassembly and replacement of internal seals, which can be tricky without experience.
- Pump Malfunctions: If your pump isn’t holding prime even after sealing all visible leaks, there might be an issue with the pump itself, such as a worn-out seal plate gasket or mechanical seal.
Ignoring a persistent prime loss isn’t just an annoyance; it can lead to severe damage to your pool pump, significantly increasing your electricity bill due to inefficient operation, and creating an ideal environment for algae to flourish in the Florida heat. For complex issues or if you’re feeling overwhelmed, don’t hesitate to reach out to experienced professionals like us at Tampa Bay Pool Care. Our CPO-certified technicians are equipped with the latest tools and decades of local experience to quickly and accurately diagnose and repair these issues, ensuring your pool stays sparkling clean and running efficiently.
Frequently Asked Questions About Prime Loss
Q1: Why does my pool pump lose prime overnight but not during the day when it’s running?
A1: This is a classic symptom of a slow suction-side air leak. When the pump is running, it’s creating a strong vacuum that often allows it to overcome the small amount of air entering the system. However, once the pump shuts off, the vacuum disappears, and gravity, combined with the slight pressure difference, allows air to slowly seep into the pump and suction lines, displacing the water over several hours.
Q2: Can a low water level cause my pump to lose prime?
A2: Absolutely! If your pool’s water level drops below the skimmer opening, the skimmer will start sucking air directly from the atmosphere. This is not a suction-side plumbing leak, but it will definitely cause your pump to lose prime. Always ensure your water level is at least halfway up the skimmer mouth.
Q3: Is it okay to keep running my pump if it keeps losing prime?
A3: No, it’s strongly advised not to. Continuously running a pump that is losing prime or running “dry” will cause it to overheat and can quickly damage critical components like the motor, mechanical seal, and pump impeller. This will lead to much more expensive repairs or a full pump replacement. Address the prime loss promptly!
Keep Your Tampa Bay Pool Pristine
A properly operating pool pump is the heart of a healthy pool, especially in the demanding climate of Tampa Bay. While diagnosing a pool pump loses prime overnight issue can seem daunting, with a systematic approach, many common suction-side air leaks can be identified and resolved by the proactive homeowner. Regular maintenance, including lubricating your pump O-rings and inspecting your plumbing, can go a long way in preventing these frustrating problems.
However, if you’ve exhausted your DIY options or simply prefer the peace of mind that comes with professional service, remember that licensed, experienced pool technicians are just a call away. Don’t let a sputtering pump ruin your enjoyment of your backyard oasis. Whether you’re in Tampa, Clearwater, St. Petersburg, or Brandon, reaching out to a qualified professional will ensure your pool system is running at peak efficiency, saving you time, money, and hassle in the long run.