Living in the Tampa Bay area, our backyard pools aren’t just a luxury; they are a survival tool for the Florida humidity. But as any homeowner from Brandon to Clearwater knows, the intense UV radiation and the relentless subtropical moisture can take a heavy toll on our pool surrounds. One of the most common issues I see as a CPO (Certified Pool Operator) is the dreaded delamination of the “Kool Deck” or acrylic knockdown texture.
If you’ve started noticing small chips in your skimmer area or large flakes of textured concrete peeling away near the waterline, you’re likely searching for peeling kool deck repair tampa solutions. The question is: can you get away with a quick patch, or is it time to bite the bullet and invest in a full resurfacing? In this guide, we will break down the chemistry of why your deck is failing, the diagnostic tests you can perform today, and the step-by-step methods for both patching and professional restoration.
Understanding the Beast: Kool Deck vs. Acrylic Knockdown
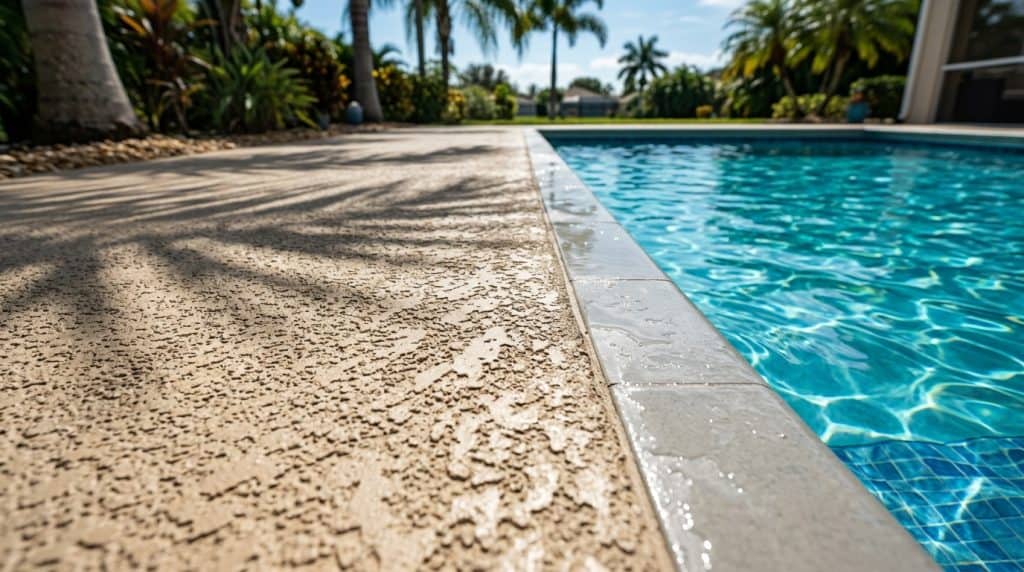
Before we dive into the repairs, let’s clear up a common industry misconception. Many people use the term “Kool Deck” as a catch-all, but there is a technical difference. “Kool Deck” is a specific brand of branded concrete topping (Mortex) applied to “green” (freshly poured) concrete. Most modern Florida pools, however, utilize an acrylic knockdown texture. This is a mixture of white marble dust, portland cement, and liquid acrylic resins sprayed through a hopper gun onto existing cured concrete.
In the Tampa Bay climate, acrylic knockdown is king because it stays cooler than bare concrete or pavers. However, because it is essentially a “thin-set” topping, its bond to the underlying slab is its greatest weakness. When moisture gets trapped between the slab and the topping, or when the Florida sun breaks down the polymer binders, the texture begins to flake, chip, and peel.
The Diagnostic Checklist: Is Your Deck a Candidate for Patching?
As a professional at Tampa Bay Pool Care, I always tell clients that the repair method depends on the “percentage of failure.” Patching a few chips is a weekend DIY project. Repairing 40% of a deck is a recipe for a patchy, ugly disaster. Use this checklist to diagnose your deck:
1. The Hollow Tap Test
Take a screwdriver handle or a small hammer and gently tap the areas surrounding the visible peeling. Does it sound “hollow” or “drummy”? If the sound is solid, the bond is still good. If it sounds hollow, the delamination has already spread beneath the surface, and that section will eventually flake off. If more than 20% of your deck sounds hollow, patching is only a temporary bandage.
2. The Edge Lift Check
Examine the edges of the existing texture. If you can slide a putty knife under the texture and easily lift up more of the coating, your deck is suffering from “adhesion failure.” This usually happens if the original installer didn’t acid-wash the concrete properly or if they applied the texture over a dirty surface.
3. Checking for “Chalking”
Rub your hand across a dry section of the deck. If your hand comes away covered in a white, chalky powder, the acrylic binders have UV-degraded. This is common with cool pool deck paint coating clearwater applications that haven’t been resealed in over 5-7 years. If the whole deck is chalking, a simple patch won’t stick; the entire surface needs a refresh.
Option A: The DIY Approach with an Acrylic Knockdown Pool Deck Patch Kit
If your damage is limited to small areas (under 5 square feet total), using an acrylic knockdown pool deck patch kit is a cost-effective way to extend the life of your surface. Here is how to do it like a pro.
Step 1: Aggressive Surface Preparation
The number one reason patches fail is poor prep. You must remove not only the loose flakes but also about an inch of the “good” texture surrounding the hole. Use a wire brush or a small chipping hammer. Once the loose material is gone, scrub the bare concrete with a solution of Muriatic acid and water (1 part acid to 4 parts water) to “open” the pores of the concrete. Rinse thoroughly and let it dry completely.
Step 2: Priming the Substrate
Don’t just throw the patch mix on dry concrete. Most high-quality kits come with a liquid bonding agent (acrylic bonder). Brush this onto the bare concrete. It should be “tacky” to the touch but not wet when you apply the patch.
Step 3: Mixing and Splatting
This is where the “art” comes in. You want to mix your patch material to the consistency of thick pancake batter. For small patches, you don’t need a hopper gun; you can use a “splatter brush” or even a large sponge to flick the material onto the deck. The goal is to create “peaks” of material that match the height of your existing texture.
Step 4: The “Knockdown”
Wait for the gloss to disappear from the wet peaks (usually 2-5 minutes depending on the Tampa humidity). Take a clean, damp pool trowel and lightly skim the tops of the peaks. You aren’t pressing it flat; you are just knocking the tops off to create that signature flat-lace look. This is the secret to how to fix chipped kool deck concrete without it looking like a glaring mistake.
Option B: Professional Full Resurfacing
When the flaking is widespread, or the deck has been patched so many times it looks like a quilt, you need a full resurface. This is the standard for peeling kool deck repair tampa when we want the deck to last another 10 to 15 years.
The Professional Process:
- Grinding: Pros use walk-behind grinders with diamond blades to remove the old, failing texture and reach “virgin” concrete.
- Crack Repair: Before the new texture goes down, any structural cracks are chased with a saw and filled with a high-strength epoxy or urethane.
- Base Coat: A “slurry coat” or primer is squeegeed over the entire deck to ensure a uniform bond.
- Texture Application: A commercial-grade hopper gun is used to spray a consistent pattern across the entire surface, followed by a professional knockdown troweling.
- Sealing/Coloring: This is the most important part for Florida pools. A high-solids pigmented acrylic sealer is applied. This protects the deck from chlorine, salt, and UV rays.
The Role of Sealers: Cool Pool Deck Paint Coating Clearwater
Many homeowners in the Clearwater and St. Pete areas think they need a full replacement when they really just need a high-quality cool pool deck paint coating clearwater specialist. If your texture is still physically bonded to the concrete but looks faded, stained, or is starting to “chalk,” a professional-grade re-seal can work wonders.
In Florida, we use “Cool Roof” technology in our deck stains. These coatings contain infrared-reflective pigments that can keep the surface temperature up to 20 degrees cooler than standard concrete paint. When choosing a sealer, look for “High-Solids Acrylic.” Avoid “Bargain” concrete paints from big-box stores; they are often too thin and will peel within a single summer season.
Why Does This Happen More in Tampa Bay?
As a CPO, I often get asked why our decks fail faster than those in the North. There are three specific “Tampa Factors”:
1. High Water Table and Hydrostatic Pressure
Our soil is sandy and our water table is high. Moisture can actually travel upward through the concrete slab (capillary action). If your acrylic knockdown wasn’t “breathable,” that moisture gets trapped, turns into vapor under the hot sun, and literally blows the texture off the concrete.
2. Salt Systems
Saltwater pools are incredibly popular in Pinellas and Hillsborough counties. While great for your skin, salt is corrosive. If your deck isn’t properly sealed, salt water splashes onto the porous knockdown, the water evaporates, and the salt crystals grow inside the pores, causing “spalling” or micro-explosions that flake the surface.
3. Improper Pressure Washing
This is the “homeowner’s mistake.” Many people try to clean their deck with a 4,000 PSI pressure washer held two inches from the surface. This is powerful enough to carve wood and will absolutely strip the acrylic bond from your concrete. Always use a wide-angle fan tip and keep the wand at least 12-18 inches from the texture.
Cost Comparison: Patching vs. Resurfacing
Budget is always a factor for Florida families. Here is a general breakdown of what to expect in the current market:
- DIY Patch Kit: $50 – $150. Great for small chips, but color matching is notoriously difficult.
- Professional Patch & Recolor: $500 – $1,200. A pro can match the texture and then spray a fresh coat of sealer over the *entire* deck so the patches are invisible.
- Full Resurfacing: $5.00 – $8.00 per square foot. For a standard 500 sq. ft. deck, you’re looking at $2,500 – $4,000. This includes prep, repair, new texture, and two coats of premium sealer.
Maintenance Tips to Prevent Future Peeling
Once you’ve addressed your peeling kool deck repair tampa needs, you want to make sure it doesn’t happen again. Follow these CPO-approved maintenance tips:
Keep it Clean (Gently)
Use a leaf blower to remove debris weekly. Organic matter like oak leaves or pine needles contains tannins that can stain the acrylic and weaken the sealer. Use a soft-bristle brush and a mild detergent (like Dawn) for occasional scrubbing.
Reseal Every 3-5 Years
Think of sealer like wax on a car. It wears out. In the harsh Florida sun, you should have your deck professionally resealed every few years. This prevents the “chalking” and moisture penetration that leads to flaking.
Watch Your Chemistry
Maintain your pool water balance! If your pH is constantly too low (acidic), the splash-out water will literally eat away at the calcium carbonate in your knockdown texture, leading to premature erosion.
Conclusion: Protecting Your Investment
A flaking pool deck is more than just an eyesore; it’s a trip hazard and a sign that your concrete slab is unprotected. Whether you choose to tackle the job yourself with an acrylic knockdown pool deck patch kit or hire a professional for a full transformation, the key is to act fast before the Florida rains turn a small chip into a backyard-wide failure.
If you aren’t sure which path is right for you, don’t guess. The team at Tampa Bay Pool Care is here to help you navigate the complexities of pool ownership in the Sunshine State. From chemical balance to equipment repair and renovation advice, we ensure your pool remains the oasis it was meant to be. Don’t let a peeling deck ruin your summer—get it fixed, get it sealed, and get back in the water!