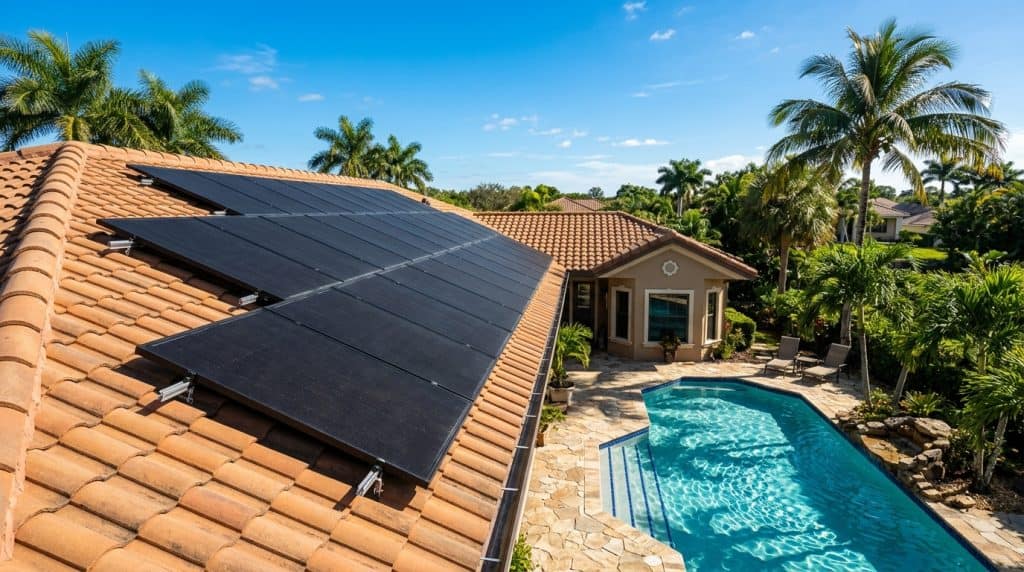
In the Tampa Bay region—from the sun-drenched coastal properties of St. Petersburg and Clearwater to the sprawling inland suburban estates of Brandon and Wesley Chapel—our pools are our sanctuaries. To stretch the swimming season into the chilly winter months, thousands of Florida homeowners rely on rooftop solar pool heating systems. It is the most cost-effective, environmentally friendly way to keep pool water at a comfortable 85 degrees year-round.
However, living in paradise comes with a seasonal tax: Atlantic hurricane season. As a master Certified Pool Operator (CPO) with decades of experience navigating the unique demands of Florida’s coastal climate, I have seen firsthand what happens when 140 mph winds meet improperly installed rooftop equipment. A single loose strap can turn a multi-thousand-dollar solar array into a series of dangerous airborne projectiles, tearing up your roof shingles and causing catastrophic structural damage in the process.
To keep your home and pool safe, this comprehensive guide will break down the engineering behind rooftop solar panel wind load ratings, explore the anatomy of hurricane-grade tie-downs, compare leading panel designs, and provide actionable steps for dealing with Tampa Bay Pool Care maintenance issues, system diagnostics, and repairs.
—
The Physics of Wind Load: Why Rooftop Solar Panels Act as Sails
To understand why hurricane tie-downs are so critical, you have to understand the aerodynamics of your roof. When hurricane-force winds hit the side of your home, they are forced upward and over the roofline. This creates a zone of localized low pressure directly above the roof surface—a phenomenon known as aerodynamic lift, very similar to how an airplane wing works.
Because solar pool heating panels have a large surface area, they are highly susceptible to these lift forces. If a panel is not firmly anchored, the wind will get underneath it, creating an upward pulling force (uplift) that can rip mounting brackets right out of the roof decking.
Florida Building Code and Wind Velocity Zones
The state of Florida has some of the strictest building codes in the world, particularly regarding wind loads (codified under the Florida Building Code, or FBC). Depending on your exact location in the Tampa Bay area, your rooftop systems must be engineered to withstand specific wind speeds:
- Pinellas County (Coastal): Often classified within High-Velocity Hurricane Zones (HVHZ) or windborne debris regions, requiring systems to withstand wind loads of up to 145–160 mph.
- Hillsborough and Pasco Counties: Generally fall into the 140–150 mph design wind speed zones.
Any solar pool heating installation must carry an FBC product approval number, certifying that when installed according to the manufacturer’s specifications (with specific bracket spacing and tie-down configurations), the panels will remain secured to the roof during a major storm.
—
Anatomy of Hurricane-Grade Tie-Downs and Mounting Hardware
A solar panel system is only as strong as its weakest connection point. If your installer used cheap materials or skipped key steps to save time, a Category 3 hurricane will expose those vulnerabilities instantly. To ensure your system is storm-ready, look for the following high-quality hardware components:
1. High-Tensile Polyester or Polypropylene Strapping
Solar panels are held down to the roof by heavy-duty straps that run horizontally or vertically across the collectors. In Florida, these straps must be UV-stabilized polypropylene or woven dacron polyester. Over time, the intense Florida sun will degrade cheap plastic strapping, causing it to become brittle and snap under the slight vibration of everyday winds. Inspect your straps annually; if they look faded, frayed, or feel brittle to the touch, they must be replaced before the next storm system enters the Gulf.
2. Structural Lag Bolts and Mounting Brackets
The straps are anchored to the roof using specialized brackets. These brackets must be secured directly into the roof trusses or, at minimum, deep into thick plywood roof decking using 316-grade stainless steel lag bolts. Stainless steel is crucial because carbon steel bolts will rapidly rust in our salty, humid coastal air, losing their structural integrity long before a storm even hits.
3. EPDM Mounting Pads and Sealants
Every single roof penetration is a potential leak waiting to happen. High-quality mounting systems use EPDM rubber gaskets underneath the mounting brackets, paired with heavy-duty polyurethane roofing sealant (such as Geocel or NP1). Silicone should never be used on asphalt shingle roofs, as it does not bond permanently to the petroleum-rich shingles and will degrade quickly under standing water.
—
The Critical Threat: Solar Pool Heating Roof Leak Repair
When high-velocity winds rattle your solar panels, they transfer massive amounts of vibration and kinetic energy down into the mounting brackets. Over time, this constant micro-movement can break the waterproof mastic seal around the lag bolts. Once the seal is broken, rainwater will seep down the threads of the bolt, soaking your roof decking, rotting the plywood, and eventually dripping into your attic or ceiling.
If you suspect water intrusion, addressing a solar pool heating roof leak repair must be handled with surgical precision. This is not a project where you simply slap some hardware-store caulk around a loose bracket.
How to Diagnose and Resolve a Solar Roof Leak
If you notice water spots on your drywall ceiling directly beneath your solar array, follow this diagnostic and repair protocol:
- Pinpoint the Penetration: Go into your attic during a heavy rainstorm with a flashlight to locate the exact lag bolt that is dripping. Mark the truss or decking with a permanent marker.
- Isolate the System: Turn off your pool automation or manually close the solar bypass valve to stop the flow of highly pressurized pool water to the roof.
- Back Out the Damaged Fastener: On the roof, carefully back out the rusted or loose lag bolt from the bracket.
- Assess the Wood: If the wood deck or truss is rotted, the bracket must be relocated to a fresh, structurally sound portion of the roof truss. Never attempt to re-anchor a lag bolt into rotted wood.
- Apply the Sealant Core: Pump a generous amount of premium polyurethane roof mastic directly into the pilot hole. This ensures that as the bolt is re-inserted, it carries the sealant deep into the wood, forming an internal water-tight plug.
- Reseal the Flashing and Bracket: Install a new, stainless steel lag bolt through an EPDM sealing washer, tighten it securely (do not over-torque, which can strip the wood threads), and cap the entire bracket with a thick dome of UV-resistant sealant.
—
Heliocat vs Fafco Solar Pool Panels: Wind Resistance and Engineering
When choosing a solar pool heating system in Florida, panel design plays a massive role in how the system handles wind uplift forces. Two of the most common design concepts on the market are represented when comparing heliocat vs fafco solar pool panels (or more broadly, individual-tube design versus solid-body design).
| Design Feature | Individual-Tube Systems (e.g., Heliocat/Heliocol) | Solid-Body Plate Systems (e.g., Fafco Style) |
|---|---|---|
| Aerodynamic Profile | Low resistance; individual round tubes with expansion gaps. | High resistance; acts as a solid flat plate or “sail.” |
| Wind Uplift Force | Extremely low; wind passes directly through the panel. | High; wind gets trapped underneath the solid sheet. |
| Required Tie-Down Straps | Fewer or none required in certain engineered mounting setups. | Heavy, continuous strap networks required across the face. |
| Roof Moisture Trapping | Minimal; rain dries quickly underneath open gaps. | High; debris and moisture can get trapped under the solid sheet. |
Understanding Individual-Tube Designs
Systems like Heliocol or Heliocat utilize patented individual-tube engineering. Instead of a solid piece of black plastic, these panels consist of individual round tubes connected by small spacer ribs. This design is highly advantageous in Tampa Bay because high-velocity winds can blow right through the gaps in the panels, reducing wind load by up to 80% compared to a solid board. Consequently, these systems require far fewer roof penetrations and straps, minimizing the risk of future roof leaks.
Understanding Solid-Body Plate Designs
Solid-body panels, pioneered by brands like Fafco, are excellent heat collectors because they maximize surface-area contact with the sun. However, because they are solid sheets, they act like a sail on your roof. This design requires a highly robust, grid-like network of tie-down straps and brackets to prevent the panels from lifting. If you select a solid-body system, your installer must be incredibly diligent with strap tensioning and lag-bolt depth to meet Florida’s strict wind mitigation guidelines.
—
Post-Storm Diagnostics: Spotting Rooftop Solar Pool Panels Hurricane Damage Florida
After a tropical storm or hurricane passes through Pinellas, Hillsborough, or Pasco county, your very first step—once it is safe to go outside—is to perform a visual inspection of your rooftop solar array. Catching damage early can prevent minor issues from turning into catastrophic home insurance claims.
The Post-Storm Checklist for Pool Owners
- Check for “Saddles” or Sagging: Look up at your roofline. Are any of the panels drooping, misaligned, or sliding down the pitch of the roof? This indicates that a mounting bracket or header strap has snapped.
- Inspect the Strap Tension: Solar straps should be taut, laying flat against the collectors. If you see straps flapping in the wind or hanging loose, the anchor points have likely pulled loose from the decking.
- Look for Shingle Lifting: Inspect the area around each mounting pad. If the shingles around the bracket look buckled, cracked, or pulled upward, the wind has exerted severe upward force on that anchor point, necessitating immediate professional inspection.
- Check the Pool Equipment Pad Pressure: Turn on your pool pump and watch the pressure gauge on your filter tank. If the pressure is significantly lower than normal, or if you see bubbles continuously blowing out of the pool return jets, your rooftop panels are likely leaking air and water.
If you suspect your home has sustained rooftop solar pool panels hurricane damage florida homeowner insurance policies often cover the cost of professional removal, roof repair, and re-installation, provided you document the damage immediately with clear photos.
—
How to Fix a Pinhole Leak in a Solar Pool Collector
Flying debris during a storm—such as broken tree branches, loose roof tiles, or even flying lawn furniture—can easily puncture your solar panels. Fortunately, if your system uses individual-tube engineering, you do not have to replace the entire expensive collector panel just because of a small puncture.
If you need to fix pinhole leak solar pool collector tubes, you can easily perform a temporary or permanent repair using a specialized solar panel repair plug kit. Here is how to do it step-by-step:
- Locate the Leak: Turn on your pool pump and let the solar system pressurize. Locate the exact tube that is spraying water. Mark it with a piece of chalk or outdoor tape, then turn off the pump.
- Isolate the Tube: Using a sharp utility knife or specialized pocket chisel, carefully slice through the thin plastic webbing on either side of the damaged tube, about 2 inches above and below the pinhole. This isolates the punctured tube from the rest of the panel sheet.
- Cut the Tube: Cut the damaged tube completely in half right at the pinhole. Trim away any jagged or shredded plastic so you have two clean, square-cut hollow tube ends facing each other.
- Insert the Repair Plugs: Take a plastic solar repair plug (available at pool supply stores or online) and apply a small dab of high-temp, waterproof adhesive (like black polymer sealant) to the ribbed end of the plug. Push the plug firmly into the open end of the tube. Repeat the process for the opposite side of the cut tube.
- Test the System: Let the adhesive cure for 24 hours. Turn on the pool pump, bypass water to the roof, and verify that the repair is completely watertight. The bypassed tube will no longer heat water, but the rest of your panel will function perfectly with zero leaks!
—
Professional Maintenance and CPO Best Practices
While DIY repairs are excellent for minor pinhole leaks, major wind mitigation upgrades and leak repairs should always be handled by licensed professionals. If your roof is nearing the end of its lifespan, it is highly recommended to have your solar panels professionally uninstalled, stored safely during a re-roofing project, and re-installed with brand-new, code-compliant hurricane tie-downs and fresh polyurethane flashing.
At Tampa Bay Pool Care, we prioritize the longevity and safety of your entire pool system. Ensuring that your filtration pump is running at the correct flow rate and that your solar bypass valves are functioning perfectly is essential to avoiding excessive pressure build-up on your roof, which can exacerbate minor leaks and strain aged piping.
Don’t wait for a tropical storm warning to find out your solar straps are brittle or your mounting brackets are loose. Perform a quick visual check today, keep your pool system properly serviced, and rest easy knowing your home is fully prepared to weather whatever the Florida sky throws our way.