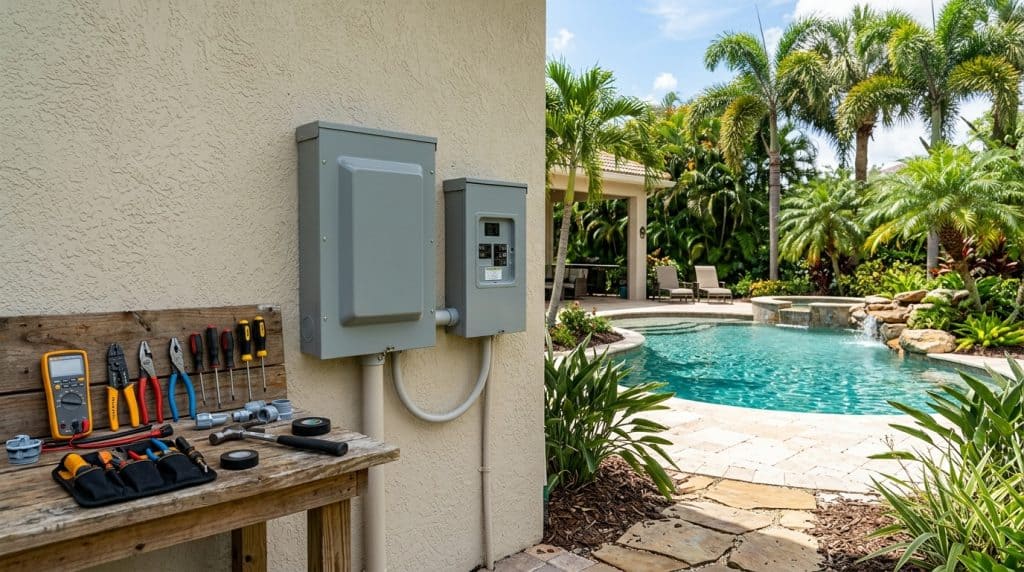
Few things are as frustrating for a Florida pool owner as preparing for a warm, relaxing evening swim, flipping the switch for your pool lights, and hearing that dreaded, hollow click of a tripped GFCI breaker. You reset it, try again, and the pool light trips gfci immediately once more. The backyard stays dark, and your plans for a night swim are cut short.
As a Certified Pool Operator (CPO) working right here in the hot, humid, and lightning-prone Tampa Bay area, I see this issue weekly. A tripping Ground Fault Circuit Interrupter (GFCI) is not just an inconvenience; it is a critical safety system doing exactly what it was engineered to do: protecting you and your family from potentially lethal electrical shocks in the water.
In this comprehensive guide, we will break down the exact diagnostic process to identify why your pool light is tripping the breaker, how to address a water in pool light fixture repair, how to resolve moisture in pool junction box gfci trip issues, and how to handle a pool light cord leak conduit seal. Let’s dive in.
—
Understanding the GFCI: Your Pool’s Lifesaver
Before we pull a single screw or grab a multimeter, we must understand what we are dealing with. A GFCI breaker or outlet does not operate like a standard breaker. While a standard circuit breaker trips when the current exceeds a certain amperage limit (overload), a GFCI monitors the balance of electrical current between the hot (line) and neutral wires.
In a perfectly functioning system, the current going out matches the current coming back. If there is a mismatch of even 4 to 6 milliamperes (mA), the GFCI detects that some electricity is escaping—potentially passing through the pool water, the metal niche, or a human body to find a path to the ground. When this occurs, the GFCI cuts the power in less than 1/30th of a second.
When your pool light trips the GFCI immediately, it means there is an active, direct path where electricity is shorting to the ground the microsecond the circuit is energized. This is almost always caused by water making contact with live electrical connections.
—
The Three Primary Culprits
In 95% of the pool light issues we diagnose in Tampa Bay, the root cause falls into one of three categories:
- Water inside the light fixture: The lens gasket has failed, allowing pool water to flood the bulb housing.
- Moisture in the junction box: Rain, high Florida humidity, or lawn sprinklers have breached the deck-side electrical junction box.
- Conduit or cord damage: The insulation on the underwater light cord has deteriorated, or water is bypassing a failing seal, causing a short circuit inside the conduit.
—
Step 1: The Diagnostic Roadmap (Isolating the Fault)
To safely fix this issue, you must systematically isolate the components of your lighting circuit. Safety warning: Always turn off the main breaker powering the entire pool subpanel before opening any electrical boxes or handling wiring.
Is It the Breaker or the Light?
Before assuming your pool light is ruined, you must rule out a faulty GFCI breaker. In our harsh Florida climate, near-daily lightning storms and intense humidity can cause GFCI breakers to degrade over time.
- Go to your pool equipment pad and turn off the breaker.
- Locate the pool light junction box (usually a raised plastic or brass box on a pipe near the pool deck).
- Open the junction box and disconnect the pool light wires (typically black, white, and green) from the feed wires coming from the switch/breaker.
- Cap the feed wires safely with wire nuts, ensuring they are not touching anything.
- Go back to the panel, reset the GFCI, and flip the light switch on.
The Verdict: If the GFCI trips even with the pool light completely disconnected, you have a bad GFCI breaker, a faulty switch, or a short circuit in the wiring running between the pad and the junction box. If the GFCI holds and does not trip, your issue is 100% located within the pool light cord, the fixture, or the junction box itself.
—
Step 2: Addressing Water in the Light Fixture
If your diagnostic test points directly to the light, the most common culprit is a failed lens gasket. Over years of exposure to hot Florida sun, pool chlorine, and acid, the rubber gasket sealing the glass lens to the stainless steel or plastic fixture shell becomes brittle, cracked, or compressed.
Pro CPO Tip: Look for the Tell-Tale Waterline
Before you even unscrew the fixture, peer through the pool water at the light lens. Do you see a waterline inside the glass? Does it look like a mini fishbowl? If you see water sloshing behind the glass, you need a water in pool light fixture repair.
How to Perform a Water in Pool Light Fixture Repair:
- Remove the pilot screw: Locate the single screw (usually a Phillips head or brass screw) at the top of the pool light rim. Remove it and set it in a safe place.
- Pull the fixture to the deck: Carefully pry the light out of its niche. There should be several feet of extra cord wrapped around the back of the fixture inside the niche. Lay the light on a soft towel on your pool deck. Never perform electrical work with the light sitting in the water.
- Disassemble the fixture: Remove the metal clamps or screws securing the heavy glass lens to the metal housing. Carefully pull the lens off.
- Dry and clean: Pour out any accumulated water. Use a dry microfiber cloth to dry the entire interior. If the bulb socket shows signs of heavy green corrosion, rust, or burning, the entire fixture may need to be replaced. If it is dry and clean, proceed.
- Replace the bulb and gasket: Never reuse an old gasket once it has leaked. Purchase an OEM (Original Equipment Manufacturer) replacement gasket. If you have an older incandescent bulb, now is the perfect time to upgrade to a energy-efficient, color-changing LED pool light bulb.
- Apply lubricant: Apply a very light coat of non-petroleum, silicone-based pool lubricant (like Jack’s Multilube) to the new gasket. This keeps the rubber pliable and ensures a watertight seal.
- Reassemble and pressure test: Clean the sealing edge of the fixture thoroughly. Seat the new gasket onto the lens, press it firmly onto the fixture, and tighten the clamps evenly. (Tighten them like lug nuts on a car wheel—alternating sides to ensure even pressure).
—
Step 3: Moisture in the Junction Box
If the light fixture is completely dry, our next diagnostic stop is the deck-side junction box. In Florida, heavy summer rains can pool around the base of these boxes. High humidity levels can cause condensation inside the box, resulting in a moisture in pool junction box gfci trip.
Furthermore, local insects (especially crazy ants and fire ants) love the warmth of electrical junction boxes. They nest inside, carry damp soil with them, and bridge the gap between hot and ground wires, causing immediate trips.
Fixing J-Box Moisture and Insect Intrusion:
- Open the cover of your junction box. Inspect the interior for water droplets, condensation, or insect nests.
- If you find water, use a heat gun or a hair dryer on a low setting to thoroughly dry out the wires, wire nuts, and the interior walls of the box.
- Look at the wire connectors. If they are standard household wire nuts, replace them with silicone-filled, waterproof wire connectors (specifically rated for outdoor/wet locations).
- Inspect the rubber seal on the junction box cover. If it is cracked or dry-rotted, replace the gasket or the entire box if necessary.
- When reassembling, ensure the conduit entries coming up from the ground are sealed at the bottom of the box with duct seal putty to prevent warm, moist air from rising up out of the underground pipe and condensing in the box.
—
Step 4: The Conduit and the Light Cord Seal
If you have confirmed that the light fixture is bone dry and the junction box is clean and dry, but the GFCI still trips instantly when the light is connected, you are likely dealing with a compromised light cord or a conduit leak.
The cord running from your pool light fixture to the junction box travels through an underground PVC pipe called a conduit. This conduit is open to the pool water at the back of the light niche. This means your light cord is permanently submerged in water inside the conduit.
Over 10 to 15 years, chlorine, acid, and movement can cause the heavy rubber jacket of the light cord to break down, dry rot, or crack. Once water penetrates the outer jacket and touches the black or white copper conductors inside, you get an immediate ground fault trip.
How to Identify a Leaking Conduit:
Sometimes, the conduit itself cracks underground due to shifting soil. This can cause your pool water level to drop continuously. The water exits the pool through the light niche, travels down the broken conduit, and drains into the ground. To resolve this, you must apply a pool light cord leak conduit seal.
Sealing a Leaking Conduit Correctly:
- Pull the light fixture out of the niche and rest it on the deck.
- Locate the small conduit opening at the back of the niche where the cord enters.
- Use a specialized, removable expanding plug designed for pool light cords (often called a “Cord Stopper”). These split rubber plugs slide over the cord and expand inside the conduit opening when you tighten a nut.
- Alternatively, you can wrap a professional butyl rubber sealing tape (like heavy-duty plumbing putty or cohesive silicone tape) tightly around the cord and press it firmly into the mouth of the conduit. This stops the flow of water while remaining flexible enough to be pulled out when the light needs replacement.
—
Complete Diagnostic & Repair Checklist
Keep this handy quick-reference checklist by your side when troubleshooting your pool light circuit:
| Step | Diagnostic Action | Potential Finding | Correction |
|---|---|---|---|
| 1 | Isolate light wires in J-Box. | GFCI still trips with light disconnected. | Replace bad GFCI breaker or check pad switch. |
| 2 | Inspect J-Box interior. | Water, condensation, or ants inside. | Dry box, seal conduit openings, use waterproof wire nuts. |
| 3 | Inspect light fixture glass. | Water sloshing inside the lens. | Replace bulb and install new OEM lens gasket. |
| 4 | Examine light cord jacket. | Cracked, dry-rotted, or exposed wires. | Pull a new pool light fixture with a fresh cord. |
| 5 | Check pool water level near niche. | Water actively leaking out of conduit. | Install split-rubber cord plug or butyl cord seal. |
—
The Danger of DIY Electrical Pool Repairs
While replacing a lens gasket or drying out a junction box is well within the capabilities of many handy homeowners, dealing with underwater high-voltage electricity is inherently risky. Mixing 120-volt currents with pool water requires perfect execution. A simple mistake can put swimmers at risk of electric shock drowning (ESD).
If you feel uncomfortable working with electrical wiring, measuring voltage, or pulling a new cord through an underground conduit, it is time to call in the professionals.
At Tampa Bay Pool Care, our CPO-certified pool technicians have the specialized testing equipment, leak detection tools, and expertise needed to safely diagnose, seal, and repair your pool’s electrical lighting systems. We serve homes across the entire Tampa Bay area, ensuring your pool remains a safe, beautiful sanctuary for your family.
—
Proactive Prevention Tips for Florida Pool Owners
To prevent future pool light and GFCI issues, keep these pro tips in mind:
- Switch to low-voltage LED lights: If your budget allows, consider converting your 120V high-voltage pool light system to a modern 12V low-voltage LED system. By stepping the voltage down to 12V via an outdoor transformer, you virtually eliminate the danger of high-voltage shocks and drastically reduce the sensitivity issues associated with 120V GFCI breakers.
- Inspect gaskets every 2-3 years: Don’t wait for your pool light to fail. If you have to replace a bulb, always replace the gasket at the same time. Treat the gasket as a wear-and-tear item.
- Keep your landscape sprinklers clear: Ensure your lawn sprinklers do not spray water directly upward at your pool light junction box. Even weatherproof boxes can fail under constant pressurized spray.
- Maintain your chemistry: Corrosive water (low pH and low calcium hardness) ruins rubber seals and copper wires. Keep your pool water balanced to extend the lifespan of your light gaskets and cords.
Enjoy Safe, Beautiful Night Swims Once Again
When your pool light trips the GFCI immediately, your pool is trying to tell you something. By following this systematic guide, you can pinpoint the source of the ground fault—whether it is water in the fixture, a moist junction box, or a leaking conduit—and resolve it safely. Keep your systems dry, inspect your gaskets, and always prioritize safety over a quick fix. Your pool will stay beautifully illuminated, and your family will stay safe.